
To play Slasher effectively in the Roblox game Forsaken, get close before attacking, manage your stamina, and save your stronger abilities for clear openings. He relies on melee attacks, so good movement and timing are essential for catching Survivors.
Slasher is a free starter Killer built for close-range combat. His abilities let him apply Bleeding, temporarily disrupt Survivor skills, and deal heavy damage when an opponent makes a mistake. This guide explains how to select him, use his abilities, and handle difficult chases.
How to Select Slasher in Forsaken
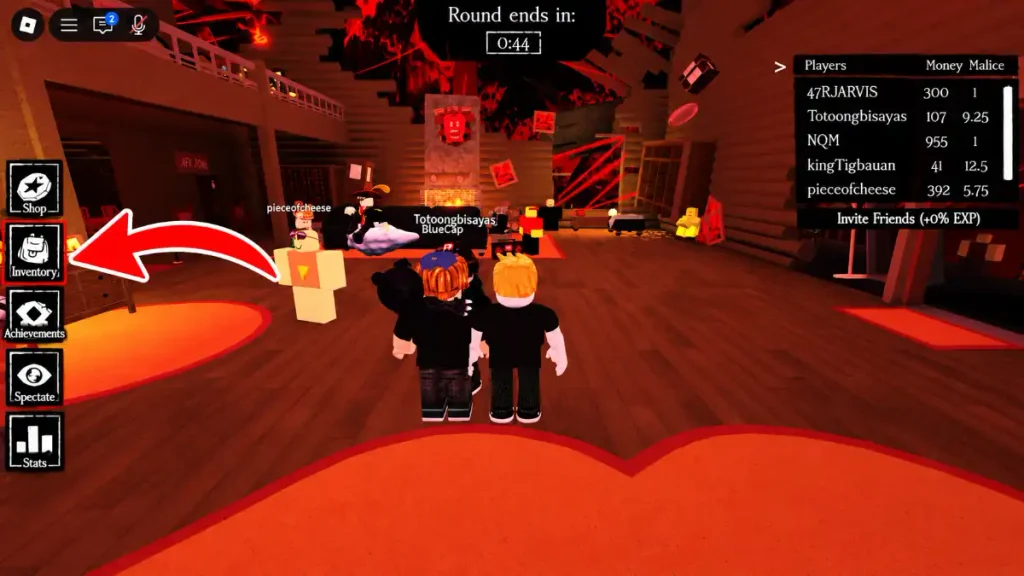
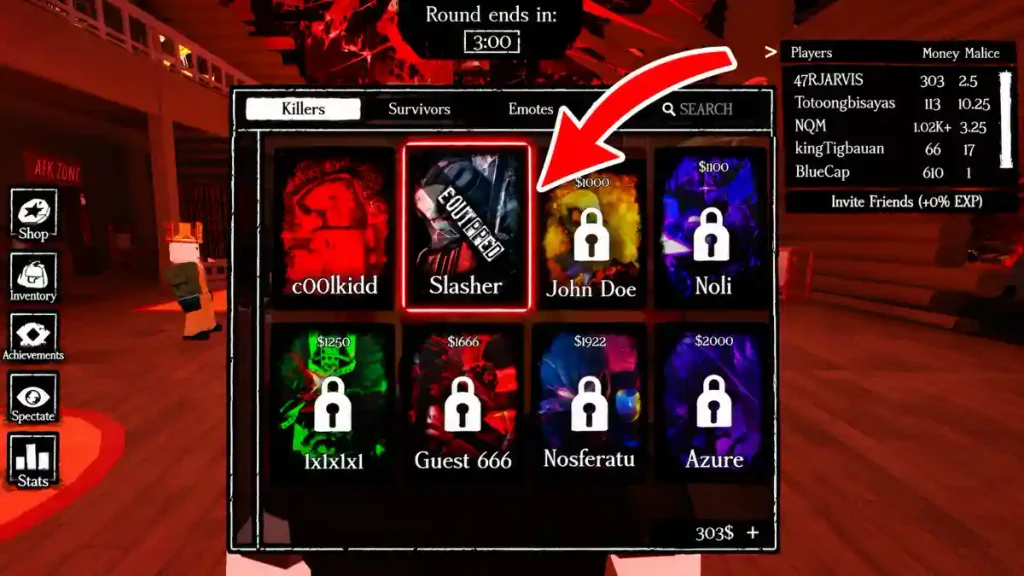
Slasher is available for free. You do not need to save Player Points or complete a character quest to unlock him.
Open the character-selection menu and find Slasher in the Killer roster. Check Inventory first if an older guide directs you to the Shop, as the interface has changed over time.
To select him:
- Open the character-selection menu.
- Find the Killer roster.
- Select Slasher.
- Use the available equip or selection control.
- Confirm that he is your selected Killer.
Menu labels may differ from older screenshots, so follow the character-selection controls visible in your game.
Equipping Slasher determines which character you use when assigned the Killer role. It does not make every match a Killer round.
Slasher’s Abilities in Forsaken
Slasher has four main abilities: Slash, Behead, Gashing Wound, and Raging Pace. Each serves a different purpose, so you should not treat them as interchangeable attack buttons.
| Ability | Main effect | Best situation to use it |
|---|---|---|
| Slash | Basic melee damage with Bleeding | When you are close enough for a reliable hit |
| Behead | Damage and temporary ability disruption through Helpless | When stopping ability use will help you continue the chase |
| Gashing Wound | Heavy melee combo ending in a ragdoll | When the Survivor has limited room to avoid the attack |
| Raging Pace | Activates the Enraged state and provides tracking and chase benefits | When you need to locate a target or improve an attack opportunity |
Slash: Your Basic Attack
Slash is Slasher’s standard machete attack. It deals direct damage and applies Bleeding, adding damage over time.
Use it when you have reached dependable melee range. Swinging while the Survivor is still too far away wastes the attack and gives them more time to escape.
During the Enraged state, Slash gains a lunge. This changes its reach, but you still need to aim and time the attack.
For beginners, landing consistent Slash hits is more important than attempting complicated combos. A basic attack that connects is better than a powerful ability that misses.
Behead: Disrupt Survivor Abilities
Behead applies Helpless, temporarily preventing the affected Survivor from using abilities. It is useful when an opponent relies on a defensive move or escape skill.
Helpless does not stop movement. The Survivor can still run, so stay close enough to benefit from the effect.
Slasher briefly slows after using Behead, including when it misses. Look for a clear opening instead of using it as soon as the cooldown ends.
For example, if a Survivor is moving through a narrow route and cannot easily change direction, you may have a better opportunity than when they are running across an open area. Positioning matters more than simply having the ability ready.
Gashing Wound: Punish a Clear Opening
Gashing Wound is a heavy combo involving Slasher’s machete and chainsaw. A successful hit deals substantial damage and ends with a brief ragdoll effect.
Save it for a target who is exposed, has made a movement mistake, or has fewer escape routes available.
Avoid using it against someone who is still comfortably outside your reach or can easily move behind cover. The potential damage does not make an uncertain attack worthwhile.
Behead does not automatically guarantee Gashing Wound. Check the Survivor’s distance and movement before committing to the follow-up.
Raging Pace: Activate the Enraged State
Raging Pace activates Slasher’s Enraged state. It increases walking speed, disables normal sprinting, and reveals a nearby Survivor’s aura.
The ability changes how you move rather than simply making your usual sprint faster. Use it with a clear purpose, such as locating a target or improving your next attack opportunity.
Remember that tracking a Survivor does not remove the obstacles between you and them. Continue watching the map and choosing a useful route.
How to Play Slasher Effectively
Slasher rewards controlled chases more than constant attacking. Good positioning makes his abilities easier to land and reduces the number of wasted swings.
Get Close Before Attacking
Do not start every chase with an attack from too far away. Close the distance first and watch where the Survivor is going.
Slasher’s smaller terror radius can help you approach a distracted target. Starting nearby gives the Survivor less time to create a large gap.
During the chase, look beyond the character model. Corners, walls, and narrow paths affect whether your next attack will connect.
If your first swing misses, adjust your position before using another ability. Repeated attacks from the same poor angle usually make the chase harder.
Manage Your Stamina
Slasher needs enough stamina to reach and stay near his target. Spending everything on the approach can leave you unable to finish the chase.
Avoid sprinting without a useful destination. During longer pursuits, watch whether your movement is actually reducing the distance between you and the Survivor.
If you keep running around the same obstacle without getting closer, you may only be wasting stamina. Recover when you have a suitable opportunity instead of forcing an unproductive chase.
Keep a reserve for sudden changes in direction. A Survivor reaching an open area or turning toward another route can require a quick response.
Choose the Right Attack
Use Slash when a straightforward hit is available. Use Behead when ability disruption will help you maintain pressure. Save Gashing Wound for a stronger opening.
You do not need to use every ability in one encounter. Keeping an option available can be more useful than spending several cooldowns at once.
After landing an attack, reassess the distance. The best follow-up depends on where the Survivor moves, not on a fixed sequence you planned before the chase.
Use Raging Pace With a Plan
Before activating Raging Pace, decide what you want from it.
Are you trying to find a nearby Survivor? Continue pressure during a difficult chase? Create an opportunity for an Enraged attack?
Avoid treating it as a mandatory opening move. Its movement changes are useful when they fit the situation, but you still need to follow the target carefully.
How to Handle Loops and Defensive Survivors
Survivors who use obstacles and defensive abilities can make Slasher’s melee attacks harder to land. Change your approach instead of repeating the same unsuccessful action.
Change Your Route Around Obstacles
Slasher has no ranged attack to threaten someone from the other side of cover. A Survivor who repeatedly circles an obstacle can delay the chase.
Watch for repeated turns and look for a shorter approach. Do not automatically copy every movement they make.
If a Survivor repeatedly heads toward the same corner, think about where they will go next rather than following their exact path. They may change direction, so stay ready to adjust.
Avoid using Behead or Gashing Wound while the target has an easy route behind cover. Wait until your position gives you a realistic chance to connect.
If the chase takes too long without a hit, consider another target. Remaining in the same loop is not useful if it prevents you from pressuring anyone else.
Watch for Defensive Abilities
Defensive Survivors can punish predictable attacks. Against Guest 1337, watch for his block instead of swinging into it automatically.
Let the opponent’s actions affect your timing. A mistimed defensive move may give you a better opening afterward.
Behead can disrupt ability use, but it still needs to land. Do not assume that having the ability available means you can ignore the opponent’s defense.